 “Otto” – The Automator
Doing things over and over?
Why?! Don’t! Geez…
Renaming files on Mac The Easy Way
One of the most powerful tools ever created by Apple has to be the Automator. Have you ever saved 50 files, only to find out your customer’s name is spelled wrong? Or, you forgot a vital piece of information, like the date, on your customer files? Perhaps, you need to make a crap load of images web friendly by taking out all of the spaces or capitalization? Well, Automator is how the nerdy people, like me… keep their sanity. Read below for more information and a demo workflow project for batch renaming files super fast.
Batch Renaming Files on the Mac
So, if you are a Mac user, you probably know how to manually rename files. If you do, you know this process really sucks! You have to click on the file to select it, then wait a second, click on the name again. The name becomes selected, and you can select the part of the name you want to change, and type that part over, and click off of the file to make the change “take.” Do that 500 times and you will be ready to kill someone, or find a job building log homes… 😉
Enter “Otto” the Automator. In short, Automator for Mac allows non-coders to build scripts or services to take the hassle and need for being a super-nerd back down to the only slightly nerdy folk. Enough talk, lets just show an example of the process. Here we go, pop on the nerd glasses, and let’s get geeky!
Using “Otto” to Batch Rename Files:
1. Open the Automator app. This is inside your applications folder, or can be called up using the “Cmd+space” shortcut for spotlight, then typing automator.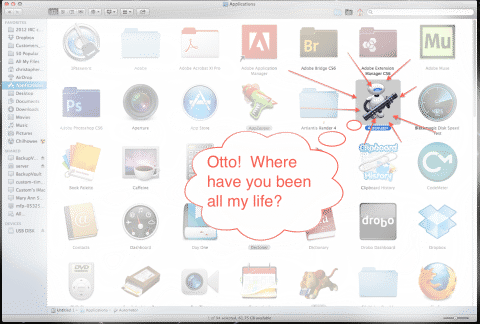 |
2. Select “Service” to make this into a contextual pop-up menu simply by right clicking (control-click).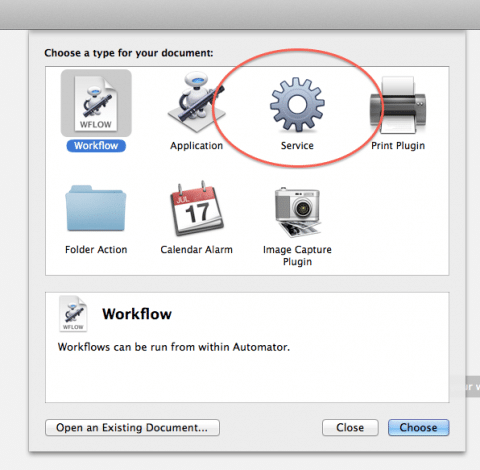 |
|
3. Once you select this ‘action,’ drag it over to start building your workflow.
|
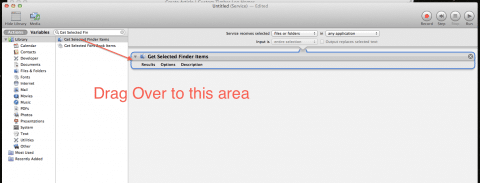
4. Next, go back to the search bar and type “rename finder items” and select this below, as before. Then drag over below the first action. (Be sure to set this to match how you think you will most often be using the service.) |
5. Note a dialog box will pop up with a scary yellow note stating you might have an issue. This is simply a note that the file names will be modified on the existing items, and will not save a copy, and would you like to duplicate the files. I usually select “Don’t add” for this one, as the action doesn’t change the actual file, just the name. Feel free to duplicate if desired.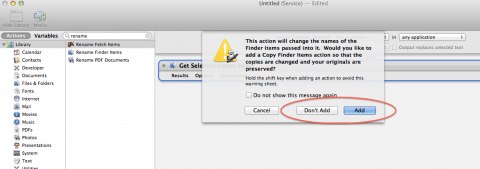 |
6. When you select “Don’t add,” you get an action that states “Add date or time” at the top. Select this drop down and choose “Make Sequential,” tick the “New Name” box, and MAKE SURE you select “Options” on the bottom of this action. Then choose “Show this action when the workflow runs.” Keep in mind, this is where you will also select what you feel will be your most used option.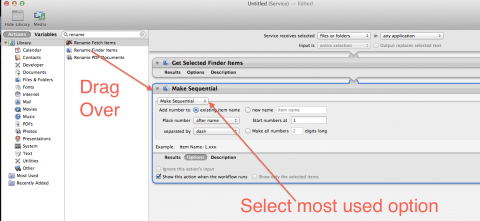 |
7. Now go to File, and Save this Service. I use a simple “rename” as this is a very simple action that requires very little description in pop-up navigation.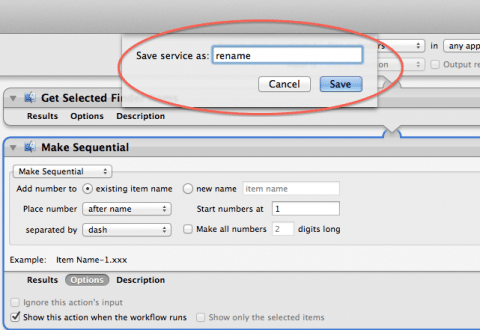 |
8. Test your new service! Choose a few files at the same time by dragging the selection tool, or “command+a” to select all items in a test folder. While the items are still selected, right click, or control+click ON ONE OF THE FILES, otherwise it will deselect itself, and choose your new service, which should be at the bottom of your pop-up.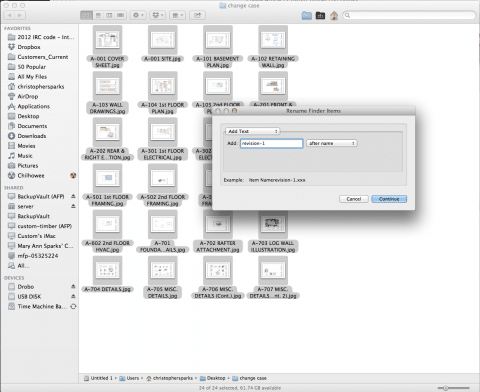 |
|
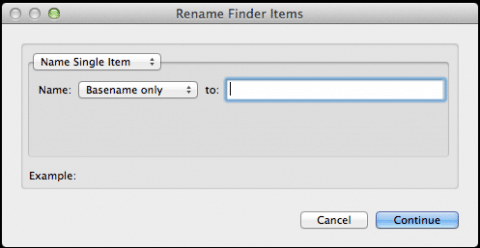
9. When you choose “rename” from the contextual pop-up menu, you should have a menu that looks just like the one in the workflow from before. Play around with the options, and get to know the interface. The more you know about this service and the power it gives normal users, the better off and more productive your work day will be. I have put in a simple description of each of the options below. Note: Here is where you say practice makes perfect, but that isn’t true. Perfect practice makes perfect. Practice just makes consistent. |

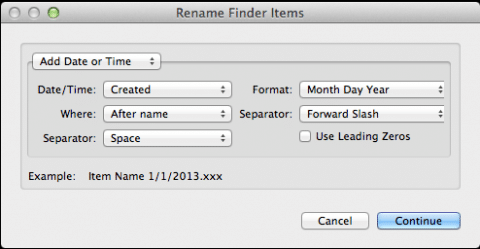
Add Date of Time:Easily add a date or time to a file name without having to manually retype anything. |
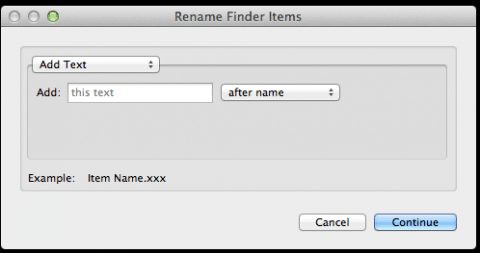
Add Text:Add in text by manually typing information. Choose changing basename, or
|
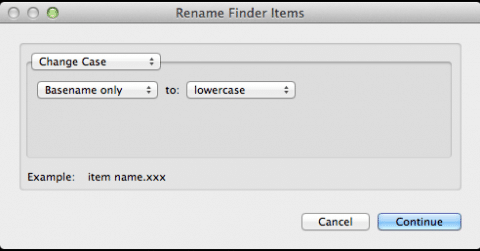
Change Case:Change the case of named items to make them web friendly.
|
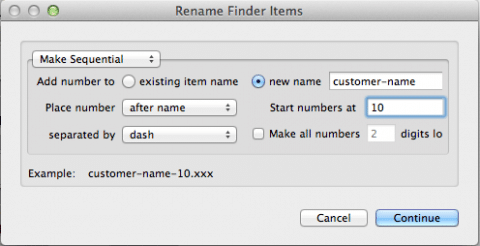
Make Sequential:This is our most common use for the rename system. We typically take images that are in the camera renaming system, and put our system names and configuration on them.
|
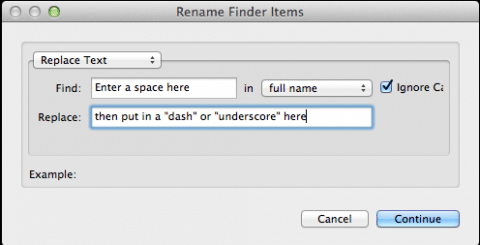
Replace Text:As it states, this is replacing existing text with new.
|
Name Single Item:I gotta be honest on this one… why does this even exist? If you know, please feel free to email and enlighten, but this seems pretty useless and even slower than the old method of renaming! Also, don’t try to select more than one. You will just anger the computer gods.
|