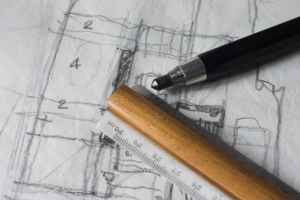
Log Home Step by Step:
When building a home, people often ask, “What happens next?” While there is no exact, step-by-step plan for building a log home, there is a usual method to our madness. Below, you will find a checklist that will give you a good idea of how your home will be built, from clearing the site, through the dry-in phase, all the way to the final product. While this is not meant to be a do-it-yourself guide, it will give you an idea of what will happen next in your project.
- Site Cleaning and Excavation (by-excavation contractor)
- Have your property reviewed by a surveyor and by the builder. If your area offers consultations from the building department, this is a great time to take them up on that. Don’t dig until given approval to do so by the “powers that be,” as this could really hold up the process later
- Corner stakes for foundation often installed by the surveyor while making plot plan
- Remove trees and clear building site as needed (after approvals, can’t be stressed enough here)
- Remove topsoil and store for reuse
- Dig basement excavation and haul or store dirt
- Dig and install septic tank and drain field (by contractor)
- Install any culverts or other items necessary for proper access to the site by large delivery trucks
- Termite Protection by Pest Extermination Company
- Treat ground around foundation with termite treatment[/fusion_toggle]
- Install Footing System and Foundation Layouts
- Layout for footings by concrete contractor
- Corner pins for foundation best if installed by the surveyor on his second trip to the site.
- Install batter boards and layout lines
- Locate, stake, and dig footings and piers pads
- Arrange for footing inspection
- Pour concrete for footings
- Installation of Foundation by Concrete/Carpenter Contractor
- Layout foundation
- Install form for poured concrete foundation or block wall system
- Install waterproofing, foam, or hot tar material
- Install drain tile and french drain system around footings
- Backfill and Rough Grade by Excavation Contractor
- Backfill around foundation
- Rough grade slope for lawn
- Trench for garage foundation, porch, and deck piers
- Installation of Subfloor by Carpentry Contractor
- Install termite shield
- Install caulking
- Layout and install sill plate
- Install center post, girder, rim, and floor joists
- Install headers, trimmers, and bridging
- Install subfloor framing material and sheathing
- Prepare for Delivery of Log Package
- Confirm exact delivery time with plant
- Confirm payment due on delivery for materials
- Confirm payment amount due for shipping
- Arrange to have certified checks available
- Prepare materials storage area, per instructions
- Prepare access road, per instructions
- Assemble equipment/manpower needed to unload logs
- Unloading and storage of logs and other materials on job site
- Unload materials, stack, and store, per instructions
- Check materials against shipping manifest
- Record damage and shortages as instructed
- Use All Technical Assistance Provided by Log Home Producer
- The construction manual
- On-site technical assistance
- Telephone technical assistance
- Other forms of assistance
 The Dry-In Phase
The following sequence of events is generally referred to as the “dry-in” phase of construction. It is the basic installation of the complete turn-key package and is usually handled by one contractor and crew. This phase of construction is thoroughly illustrated and discussed in the Custom Timber Log Homes Construction Guide.
- Installation of Porch and Deck Floor Systems by Carpentry Contractor
- Installation of doubled perimeter band
- Installation of floor support posts (Note: If these are over the provided 16′ length, they will need to be provided by homeowner)
- Installation of joists
- Installation of 5/4 decking
- The First Course of Logs by Carpentry Contractor
- Layout house by following floor plan dimensions on log cut sheet
- Layout electrical outlets and fixtures on subfloor
- Install starter strip, caulking, etc., per plan
- Install first course of logs, per instructions
- Make provision for electrical outlets in log walls
- Erecting Log Walls by Carpentry Contractor
- Installation of insulation, caulking, foam gasket
- Use of spline materials to prevent air infiltration
- Installation of fastening devices (Bolts: lag screws, through bolts, rods)
- Apply adhesives
- Installation of in-line splices in log walls
- Installing logs between window and door openings while keeping window and door bucks square and plumb, while keeping corners plumb and true
- Installation of headers, maintaining level window line
- Level top course, preparing for second floor system
- Installation of Second Floor Framing Systems – by Carpentry Contractor
- Notching of wall logs to accommodate floor joists (if necessary)
- Installation of center girders and support posts (also notched, if necessary)
- Installation of floor joists
- Installation of wiring for overhead lighting
- Installation of 2×6 tongue-and-groove decking
- Methods of accommodating settling with provided screw jacks
- Installation of Stairs to Second Floor – by Carpentry Contractor
- Cut stringer material per plan
- Use scrap framing for treads if conventionally framed, or cover finished material in exposed system with protection
- Install finished treads near end of entire project on conventionally framed stairs
- Installation of Gable Ends and Shed Dormer Walls – by Carpentry Contractor
- Install solid log gable end and dormer walls, pre-cut and uncut (if applicable)
- Install framed and sheathed gable end and/or dormer walls
- Frame for windows in exterior walls (maintain plumb walls at dormer and gable ends)
- Special bracing requirements
- Instal OSB sheathing
- Install house wrap
- Install exterior siding
- Installation of Premier iOS Roof Systems – by Carpentry Contractor
- Install rafters, ridges, and support posts
- Install of continuous vent strip
- Install 2×6 tongue-and-groove decking
- Install wiring for overhead lighting
- Install vapor barrier
- Install perimeter solid blocking for insulation layer
- Install insulation layer
- Install 1x ventillation system
- Install roof sheathing layer
- Install felt
- Install shingles
- Conventional roof systems, if premier roofing is not used
- Roof truss system
- Flat truss
- Scissor truss
- Attic truss
- Stick-built system
- Optional exposed collar ties into conventional systems
Note: Insulation and interior ceiling liner (used with conventional roof systems) are not included in standard pricing.
- Installation of Premier Porch iOS Roof Systems – By Carpentry Contractor
- Install porch roof support posts and plates
- Install porch rafters
- Install wiring for overhead lighting (prior to decking)
- Install 2×6 tongue-and-groove decking
- Install felt paper
- Install shingles
Note: Conventional porch roof systems are generally stick-built framing with ceiling joists for a flat ceiling. Soffit material for overhang areas (1×6 T&G) is included, but the ceiling material is not included in standard pricing.
- Heavy Timber Porch System Option
- Installation of porch knee wall
- Install framing
- Install continuous vent strip
- Install siding
- Installation of roof fascia, trim, and soffit material – by carpentry contractor
- Install 1×6 T&G soffit material on conventional roofs
- Install Sub fascia boards around entire perimeter of house and porch roof systems, if conventionally framed
- Installation of Windows and Exterior Doors – by Carpentry Contractor
- Install window bucks
- Attach bucks to log walls to accomodate settling
- Allow settelment space for windows and doors
- Create weather-tight seal between buck and jamb
- Caulk, install insulation and flash per requirements
- Install exterior trim
- Installation of subfloor band siding also by carpentry contractor
- Install Interior Partitions – by Carpentry Contractor
- Connect partition walls to exterior log walls
- First floor studwalls should be “floating” and include settlement space
- Install plumbing walls (2×6 in most cases)
- Frame walls for interior doors
- Interior wall coverings not included in standard package
This marks the completion of the Dry-in phase of construction. 
- Installation of Fireplaces and Chimneys – by Masonry Contractor
- Erection of brick and block work for fireplace
- Install masonry or metal firebox
- Install chimney cap, mantel, and hearth
- Install Roofing – by Roofing Contractor
- Install flashing
- Install finish roofing materials
- Installation of Electrical Service – by Electrical Contractor
- Installation of electrical service in a log home differs very little from conventional construction.
- Where special installation is required, this is generally explained in the construction manual and/or on the supplied blueprints.
- Install electrical wiring, outlet boxes, fixture boxes, switches, connectors, entrance panel, security systems, any speaker wire, and circuit breakers
- Install light fixtures
- Install hook-up appliances
- Install heating and air conditioning equipment
- Install wiring for any special electrical equipment
- Installation of Plumbing System by Plumbing Contractor
- Install main water supply line
- Install main sewer line
- Install water/drain pipes, vents, drains
- Install fixtures and faucets
- Install special equipment such as water softeners, sump pumps, pressure relief valves, etc.
The installation of the plumbing system in a log home differs very little from conventional construction. Where special installation is required, this is generally explained in the construction manual and/or on the provided blueprints.
- Installation of Heating and Air Conditioning Equipment by HVAC Contractor
- Installation of HVAC equipment in a log home differs very little from conventional construction. Where special installation is required, this is generally explained in the construction manual and/or the provided blueprints.
- Install trunk lines and duct work
- Install heating system
- Install air conditioning equipment
- Installation of Interior Walls and Ceilings – by Drywall Contractor
- Install gypsum wallboards
- Install metal cornerbeads
- Install joint compound and tape
- Finish sheetrock material for application of paint
- Installation of Exterior Finish and Trim – by Carpentry Contractor
- Install garage doors
- Install shutters (if applicable)
- Install any additional flashing
- Installation of Gutter, Downspouts, Splash Blocks – by Sheet Metal Contractor
- Install gutters and downspouts
- Install splash blocks
- Installation of Concrete Floors, Walks, Drives – by Concrete Contractor
- Install vapor/vegetation barrier
- Install crushed stone base
- Install radon vent pipe
- Install reinforcing wire or rods
- Install forms and screens
- Install expansion joints
- Install condensate drains and plumbing lines/drains
- Installation of Interior Finish and Trim – by Carpentry Contractor
- Install underlayment and flooring
- Install interior doors and hardware
- Install interior window/door trim
- Install baseboard, base molding
- Install wall molding and/or chair rail (if applicable)
- Install cabinets, counter tops
- Install vanities, bars, and other miscellaneous equipment
- Install closet shelves/poles
- Install stair treads, railings, balusters
- Install tub and shower doors
- Installation of Painting, Wall Covering – by Painting Contractor
- Apply interior paint and wood finish
- Apply exterior wood finish, preservative
- Install wallpaper (if applicable)
- Installation of Floor Covering – by Flooring Contractor
- Install hardwood flooring
- Install tile
- Install carpeting and pad
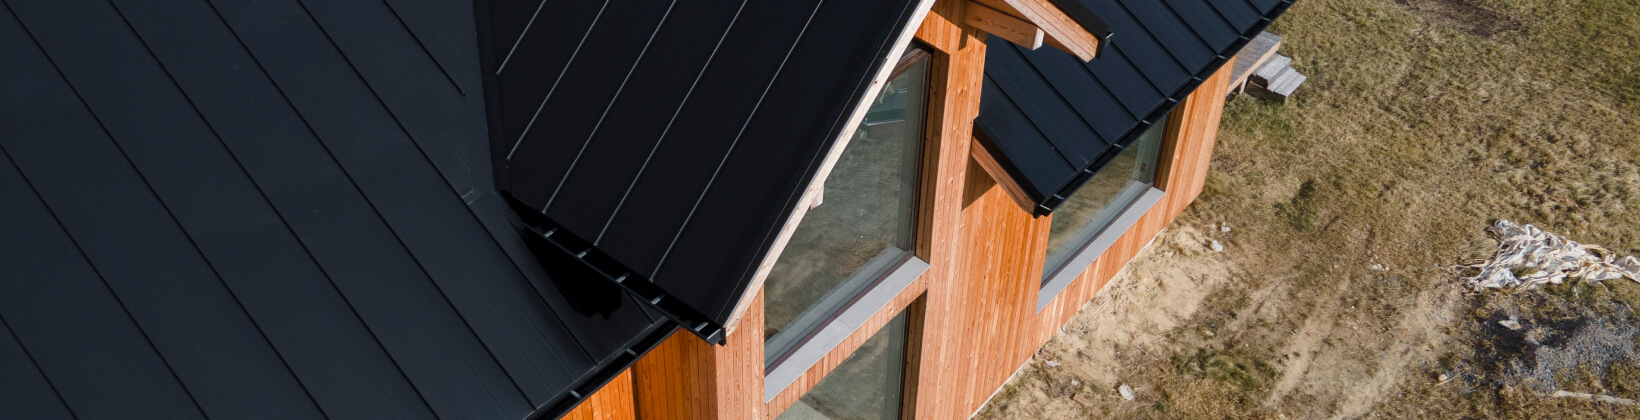
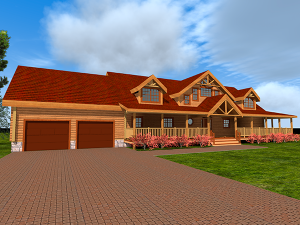
The Final Product: A “Modern” Log Home
 Remember, this is a sample construction project shown in order of installation. Time lines will vary depending on the build location, weather, the size of the home, the complexity of the home design, availability of subcontractors, and many other issues.
- Grading and excavating
- Install temporary utilities
- Install forms, pour footings, and foundation
- Install subfloor and backfill
- Erect log walls
- Install interior wall partition
- Install second floor system
- Install roof system and rough plumbing
- Install rough electrical
- Install heating and air conditioning rough-in materials
- Interior walls, drywall, paneling, etc.
- Exterior finish, soffits, windows, and doors
- Finish interior carpentry
- Install tile work
- Install cabinets
- Install concrete driveways and sidewalk
- Finish interior painting and all covering
- Finish electrical outlets and fixtures
- Finish plumbing, set fixtures, etc.
- Finish flooring, hardwood, and carpet
- Final landscaping
- General cleanup
- Final inspection and move-in date!